
Explanation of icons
Here is a brief description of the icons you find in the maps and on the harbour sites. In the maps most icons have colors, while the harbour sites mostly uses icons in black and white.
Harbour types:
 |
Marina. The icon is shaped like a diamond. The number displayed on the diamond indicates how well the harbor is protected from wind the coming night. 0 is very poor, 10 is best. The icons also change color with the numbers. Red is very poor, orange is in between, and green is good. |
|
 |
Natural harbour. The icon is shaped like a circle. The number displayed on the circle indicates how well the harbor is protected from wind the coming night. 0 is very poor, 10 is best. The icons also change color with the numbers. Red is very poor, orange is in between, and green is good. |
Mooring:
 |
 |
To pier/wharf. The yellow outline in the map shows guest berths. |
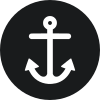 |
Anchoring |
|
 |
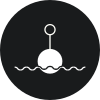 |
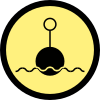
Mooring buoy |
 |
Towards land |
|
 |
Towards land - motorboat |
|
 |
Alongside land - motorboat |
|
 |
Towards land - sailboat (2m draft) |
|
 |
Alongside land - sailboat (2m draft) |
|
 |
 |
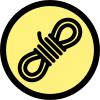
Mooring bolts |
Facilities:
 |
Shore power |
|
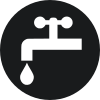 |
Fresh water |
|
 |
 |
Toilet |
 |
 |
Shower |
 |
 |
Washing machine |
 |
 |
Sewage disposal |
 |
 |
Fuel |
 |
 |
Playground |
 |
 |
Swimming area |
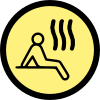 |
Sauna |
|
 |
BBQ area |
|
 |
Crane |
|
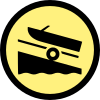 |
Slipway |
|
 |
Dinghy dock |
|
 |
Ship chandlery |
Other:
|
Overview image. The arrow shows the camera direction. |
||
 |
Favorite harbors |
|
 |
Places where leisure boats have previously spent the night. Used as an indication of anchorages, opportunities to moor towards land and where you can find guest berths in ports. The data is based on shared AIS positions and there are some inaccuracies in the data. |